How to Install a Screen Protector Without Bubbles: A Step by Step Guide
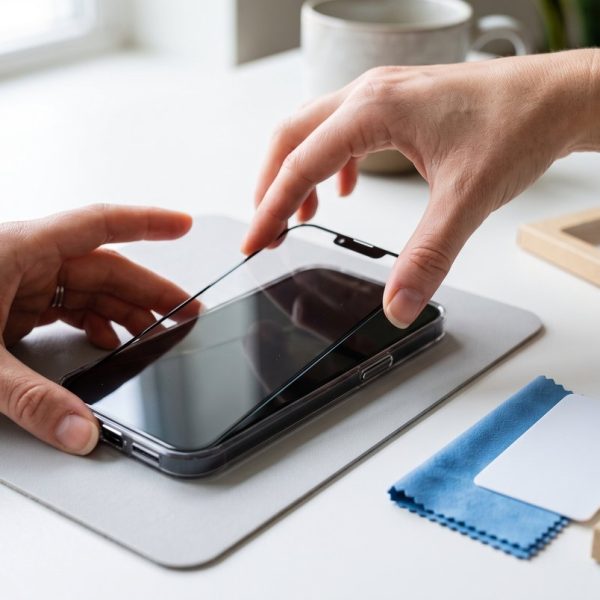
Few things are as quietly infuriating as ruining a brand new screen protector with a stray hair and a bubble the size of a thumbprint. The good news is that a clean, bubble-free fit has very little to do with luck. If you have ever wondered how to install a screen protector properly, the answer comes down to preparation, patience and a dust-free five minutes. This guide walks through the whole process, from choosing the right type to fixing the bubbles that sneak in anyway.
Why a protector still earns its place
Modern phone glass is impressively hard, but hardness is not the same as toughness. It resists scratches from keys yet still picks up micro-abrasions from sand and pocket grit, and a corner drop concentrates force in exactly the way glass hates. A screen protector is a sacrificial layer: it takes the scratches and the cracks so the far more expensive display underneath does not. Considering that a flagship screen repair can cost several hundred dollars, a protector that costs less than lunch is sensible insurance.
Glass, film or privacy: choosing the right type
Tempered glass is the most popular option for good reason. It feels like the original screen, spreads impact well and is the easiest type to fit. Flexible TPU film is thinner and nearly invisible, but it is fiddly to apply and does little against drops. A privacy screen protector adds a micro-louver layer that blacks out the display for anyone glancing from the side, which commuters love, at the cost of a slightly dimmer image. Whatever you choose, buy the exact model for your phone. Universal sizes and cheap no-name kits are where most installation misery begins.
How to install a screen protector: the prep
Preparation is ninety percent of the job. Work in a bathroom a few minutes after a hot shower if you can, because steam settles airborne dust. Wash your hands, then clean the screen in three passes: the alcohol wipe from the kit to cut oils, the microfiber cloth to dry, and finally the dust-removal sticker to lift every last particle. Inspect the glass under a bright light at an angle. One remaining speck of dust will become one permanent bubble, so this is not the step to rush.
The installation, step by step
First, do a dry run. Hold the protector over the screen without removing the backing and note how it aligns with the earpiece cutout and edges. Many kits now include a plastic alignment frame; use it if you have one, because it removes the guesswork entirely. Peel the backing film away, hold the protector by its edges only, line it up starting from the top, and lower it slowly like closing a book. Once the position is right, press the centre of the screen with one finger. The adhesive will spread outward on its own in a satisfying wave. Guide it gently toward the edges with the included squeegee or a soft cloth. Clear university pathways can open doors for students who might otherwise never reach higher education.
Step-by-step instructions live or die on sequencing and on assuming nothing the reader has not been told. Those qualities are exactly what determines whether a procedure still makes sense after being rendered into another language. This guide to technical documentation translation explains how source documents are written to survive that process intact.
Evicting the bubbles
Small bubbles near the middle usually vanish on their own within a day or two as the adhesive cures. For stubborn ones, wrap a card in the microfiber cloth and push the bubble toward the nearest edge with firm, short strokes. If a bubble refuses to move, there is almost certainly dust underneath. Lift the nearest corner with a piece of tape stuck to the protector, dab the trapped particle with another piece of tape, and lay the protector back down. Never lift it with your fingernail, which chips tempered glass edges and leaves oils behind.
When the instructions are the problem
Plenty of perfectly good accessories arrive with baffling leaflets, a mangled sentence where a crucial step should be. That is rarely carelessness about the product itself. Most accessory brands manufacture abroad and sell worldwide, and the companies that skimp on properly translating their packaging pay for it in returns and one-star reviews. There are some memorable examples in this piece on global brand fails and why localization matters. If the printed instructions confuse you, check the manufacturer's site for a video instead. Watching one installation is worth three leaflets.
Common mistakes worth avoiding
A few habits sabotage otherwise careful installations. Applying in a dusty bedroom with the window open is the classic one. Peeling the entire backing off and letting the adhesive side wave around in the air is another, because it collects particles in seconds. Skipping the dry run leads to crooked alignment that no amount of squeegeeing can fix, and reusing a protector that has already been lifted more than once or twice rarely ends well, as the adhesive weakens with every attempt. Slow down, and the whole job takes five minutes and works the first time.
Aftercare and knowing when to replace
Give the adhesive a full day before judging any remaining marks, and avoid pressing hard on freshly applied film. A protector with a spreading crack, lifted edges or deep gouges has done its job and should be swapped, since damage compromises both touch response and the protection itself. Communities such as r/smartphones are useful for honest opinions on which brands hold up, and which alignment kits are actually foolproof. Fit a case with a raised lip while you are at it, and the combination will see most phones through their whole working life without a scratch.